Wednesday, November 19, 2008
Basic make up need.
Basic make up need.
I understand and I too know that many of them know how to do a very basic make up.
Today, I will introduce some good make up brands for everyone in their basic make up needs.
Concealer,
Unlimited budget,go for:


Benefit, Very thick texture, good coverage
tight budget,go for:

ZA, very good coverage especially under the eye.
(have been using this for more than 4 years)
Foundation,
Unlimited Budget, go for:

Laura Mercier foundation.
Good coverage with smooth texture.
Tight budget, go for:

Maybelline liquid foundation.
texture is sligthly thinner but do good for mild coverage, suitable for normal skin type.
Loose powder,
unlimited / tight budget, go for:

Kate loose powder
Because loose powder is to set your foundation. Why purposely buy an expensive branded powder?
Eyebrow,
Unlimited budget,go for:


tight budget, go for:

Kate, available in various color. Smooth and glidable. Very thin pencil so you can slowly shape your eyebrow with very least error.
Eyeshadow
Unlmited budget,go for:
MAC, eyeshadow.As you knowMAC is a very well known make up brand so as their quality.
tight budget, go for:

Elianto eyeshadow. I myself dont really prefer elianto's color but undeniable they colors are lovely. Just be careful because their eyeshadows are really really fragile.
Eyeliner,
Unlimited budget,go for
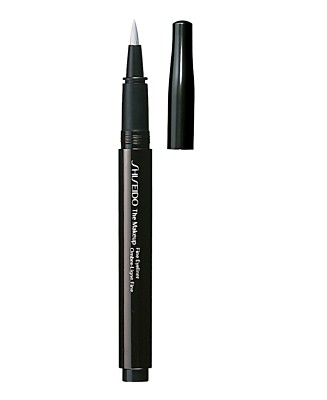
Shiseido liquid liner. Smooth and color come out firm!
tight budget,go for:
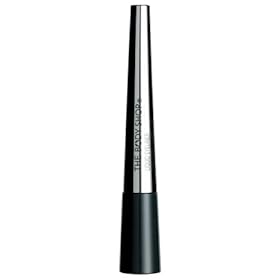
Bodyshop eyeliner. NATURAL INGRIDIENT =/ . I am not very sure about it.
Mascara,
Unlimited budget,go for:

2 words, Dark and long.
Tight budget,go for:

very famous affordable mascara.
Blusher,
Unlimited budget,go for:

Dior blusher
Tight budget,go for:

Skin Food
Lipgloss.

Lancome juicy lipgloss~
Tight budget, go for:

Mentholeum LIPCICE!! heal your lips, color your lips!
p/s: I personally think these make ups are good. I am sorry if they give your problems to your skin and if you have any nice and good products to intro, do drop us a comment!! =)
Good Luck girls!!~
I understand and I too know that many of them know how to do a very basic make up.
Today, I will introduce some good make up brands for everyone in their basic make up needs.
Concealer,
Unlimited budget,go for:
OR
Benefit, Very thick texture, good coverage
tight budget,go for:
ZA, very good coverage especially under the eye.
(have been using this for more than 4 years)
Foundation,
Unlimited Budget, go for:
Laura Mercier foundation.
Good coverage with smooth texture.
Tight budget, go for:
Maybelline liquid foundation.
texture is sligthly thinner but do good for mild coverage, suitable for normal skin type.
Loose powder,
unlimited / tight budget, go for:
Kate loose powder
Because loose powder is to set your foundation. Why purposely buy an expensive branded powder?
Eyebrow,
Unlimited budget,go for:
Shu Uemura,
If i am not mistaken their eyebrow pencil is not as expensive. Trim them like in the second image as it will be easier for you to draw your eyebrow in perfect shape.
If i am not mistaken their eyebrow pencil is not as expensive. Trim them like in the second image as it will be easier for you to draw your eyebrow in perfect shape.
tight budget, go for:
Kate, available in various color. Smooth and glidable. Very thin pencil so you can slowly shape your eyebrow with very least error.
Eyeshadow
Unlmited budget,go for:
MAC, eyeshadow.As you knowMAC is a very well known make up brand so as their quality.
tight budget, go for:
Elianto eyeshadow. I myself dont really prefer elianto's color but undeniable they colors are lovely. Just be careful because their eyeshadows are really really fragile.
Eyeliner,
Unlimited budget,go for
Shiseido liquid liner. Smooth and color come out firm!
tight budget,go for:
Bodyshop eyeliner. NATURAL INGRIDIENT =/ . I am not very sure about it.
Mascara,
Unlimited budget,go for:
2 words, Dark and long.
Tight budget,go for:
very famous affordable mascara.
Blusher,
Unlimited budget,go for:
Dior blusher
Tight budget,go for:
Skin Food
Lipgloss.
Lancome juicy lipgloss~
Tight budget, go for:
Mentholeum LIPCICE!! heal your lips, color your lips!
Did I miss out anything??
p/s: I personally think these make ups are good. I am sorry if they give your problems to your skin and if you have any nice and good products to intro, do drop us a comment!! =)
Good Luck girls!!~
Monday, November 10, 2008
How to create double eyelid
How to create double eyelid
Hey girls,
First, my apology for not updating this blog so frequent due to my pack schedule.
Now, I know some of you are born with single eyelids and I know you want double eyelids quite badly. JUST LIKE ME! I have single eyelids for 9835289375 years and i am SICK OF IT~ and now I finally found a solution for single eyelids.
Let me share this with you ^_^
REMEDY FOR SINGLE EYELIDS.

1. Single eyelid (my right eye)

2. First, use water or cleansing water to cleanse out excessive oil on your skin

3. Like this.

4. Then use the eyelash glue / eyelid emulsion.

5. gently apply a certain amount on your lid. Apply slightly higher, away from your lashes. The higher you apply, the bigger your eye will be.

6. Wait till the glue is half dried or when it turns abit transparent.

7. Gently use the fork to push in the lid so that your upper and lower skin stick together.

8. Simple and zero pain.

1. Eye base is ok since you rarely touch the glue on your eye.

2. Slowly blend the color you desire on top of your lids. You might encounter patchiness around your eye but after everything you can touch up a bit to make it least patchy.

3. Another important thing is your eye liner. Liquid eye liner tends to dry up fast then and as you are applying you dragged the liquid eyeliner and it might split your eyelids (as in the upper and lower skin detach). So its ideal to use powder and create a natural eyeliner also doesn't affect your eyelids.

4. Then lower liner.

5. This is the most difficult part of all. Please be very careful when you curl your lash.Use your so call "inner strenght". Hold your curler hard then gently use move your thumb to curl those beautiful lash. Ah, i can't teach you how to use your "inner strenght" just becareful.

6. Mascara.... as usual how you apply mascara.

7. Lower lash.

8. Tada~ Done.

9. With eye open. Sorry about the redness of the eyes. Yesterday went swimming with contact lens. My eye was super dry and today is SPECS DAY, wore them the whole day.

...and these are the tools used. Simple right?
I can do it..as can you.
Good luck?
Question??? add in comment.
Hey girls,
First, my apology for not updating this blog so frequent due to my pack schedule.
Now, I know some of you are born with single eyelids and I know you want double eyelids quite badly. JUST LIKE ME! I have single eyelids for 9835289375 years and i am SICK OF IT~ and now I finally found a solution for single eyelids.
Let me share this with you ^_^
REMEDY FOR SINGLE EYELIDS.

1. Single eyelid (my right eye)

2. First, use water or cleansing water to cleanse out excessive oil on your skin

3. Like this.

4. Then use the eyelash glue / eyelid emulsion.

5. gently apply a certain amount on your lid. Apply slightly higher, away from your lashes. The higher you apply, the bigger your eye will be.

6. Wait till the glue is half dried or when it turns abit transparent.

7. Gently use the fork to push in the lid so that your upper and lower skin stick together.

8. Simple and zero pain.
Okay, here is another tip on how to apply make up on an artificial double eyelid.
The key is make sure you do everything genlty and slow. As you know glue or sticky stuff is always agianst powder.
The key is make sure you do everything genlty and slow. As you know glue or sticky stuff is always agianst powder.

1. Eye base is ok since you rarely touch the glue on your eye.

2. Slowly blend the color you desire on top of your lids. You might encounter patchiness around your eye but after everything you can touch up a bit to make it least patchy.

3. Another important thing is your eye liner. Liquid eye liner tends to dry up fast then and as you are applying you dragged the liquid eyeliner and it might split your eyelids (as in the upper and lower skin detach). So its ideal to use powder and create a natural eyeliner also doesn't affect your eyelids.

4. Then lower liner.

5. This is the most difficult part of all. Please be very careful when you curl your lash.Use your so call "inner strenght". Hold your curler hard then gently use move your thumb to curl those beautiful lash. Ah, i can't teach you how to use your "inner strenght" just becareful.

6. Mascara.... as usual how you apply mascara.

7. Lower lash.

8. Tada~ Done.

9. With eye open. Sorry about the redness of the eyes. Yesterday went swimming with contact lens. My eye was super dry and today is SPECS DAY, wore them the whole day.

...and these are the tools used. Simple right?
I can do it..as can you.
Good luck?
Question??? add in comment.
How To Apply False Lashes.
How to Apply False Lashes.
I know many of them already know how to apply false lashes but few of my beloved girls requested a post on how to apply false lashes. So here it is.

This is the new lashes that I will be selling, COB 001-003

1. First, measure the lash according to the size of your eye or length that you desire.


2. Then trim them.

3. Curl your lashes.

4. Apply lash glue on the lash bone.
*tips: leave it for a while till your glue is half dried before applying. This will make your glue stickier and easier to stick on your lids.

5. Start by adjusting your false lash at middle of the eye, hold it still for a few second before proceeding to do the same on the inner corner of your eye.

6. once you make sure that both the sides are in the required position, hold the end of the false lash to the outter corner of your eye and give a genlte pressure to your eyelid so that the false lash stay in place

7. Before the glue is fully dry, lightly push the lash upwards to make it curl.


8. Gently push your lash downwards and upwards to make sure that it sticks firmly on your lids.

9. Done with applying the lash.

10. Apply eyeliner on top of your false lash to make the lash bone least obvious.

11. Apply mascara so that your real lash will attached with the false lash.

12.This time curl you real and false lash together. (Be very careful, make sure your false lash doesn't come out, if not you will have to start over again)

13. Finished with lower liner and TADA!~ DONE~
Subscribe to:
Posts (Atom)